
Nginx, pronounced “engine-x,” is a high-performance web server and reverse proxy server. Nginx is a fast, efficient, and scalable web server, making it a popular choice for serving static content, handling high-traffic websites, and acting as a reverse proxy for various applications. Now we will learn how to install Nginx
1. Install Nginx
On Ubuntu, you can easily install Nginx from the APT repository
sudo apt update
sudo apt install nginx
2. Adjusting the Firewall
Before conducting tests on Nginx, it is essential to adjust the firewall software to permit access to the service. Upon installation, Nginx automatically registers itself as a service with ufw, simplifying the process of allowing access to Nginx.
To view the application configurations recognized by ufw, you can execute the following command:
sudo ufw app listThis command will provide a list of available application profiles, including those related to Nginx:
Output Available applications: Nginx Full Nginx HTTP Nginx HTTPS OpenSSH
The output demonstrates three profiles for Nginx:
- Nginx Full: This profile opens both port 80 (normal, unencrypted web traffic) and port 443 (TLS/SSL encrypted traffic).
- Nginx HTTP: This profile opens only port 80 (normal, unencrypted web traffic).
- Nginx HTTPS: This profile opens only port 443 (TLS/SSL encrypted traffic).
It is advisable to enable the most restrictive profile that still permits the traffic you have configured. In the current context, enabling traffic on port 80 is sufficient. Enter the following command to accomplish this:
sudo ufw allow 'Nginx HTTP'To confirm the changes, you can check the firewall status, typing:
sudo ufw statusThe output will indicate which HTTP traffic is allowed:
Output
Status: active

To                         Action      From
--                         ------      ----
OpenSSH             ALLOW       Anywhere
Nginx HTTP         ALLOW       Anywhere
OpenSSH (v6)      ALLOW       Anywhere (v6)
Nginx HTTP (v6)  ALLOW       Anywhere (v6)
3. Checking nginx work on your server
Upon completion of the installation process, Ubuntu 20.04 automatically initiates Nginx, ensuring that the web server is already operational. To verify the service status, you can employ the systemd init system with the following command:
systemctl status nginxThe output should resemble the following:
Output
● nginx.service - A high performance web server and a reverse proxy server
   Loaded: loaded (/lib/systemd/system/nginx.service; enabled; vendor preset: enabled)
   Active: active (running) since Fri 2020-04-20 16:08:19 UTC; 3 days ago
     Docs: man:nginx(8)
 Main PID: 2369 (nginx)
    Tasks: 2 (limit: 1153)
   Memory: 3.5M
   CGroup: /system.slice/nginx.service
           ├─2369 nginx: master process /usr/sbin/nginx -g daemon on; master_process on;
           └─2380 nginx: worker process
This output confirms that the service has been initiated successfully. However, the most effective way to validate the installation is to request a page from Nginx.
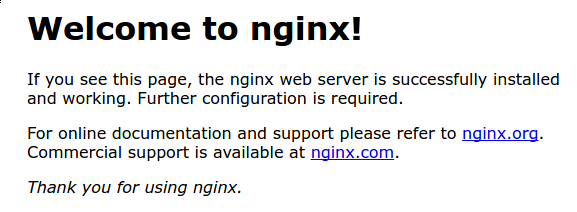
You can confirm the proper functioning of the software by accessing the default Nginx landing page through your server’s IP address. If you are unsure about your server’s IP address, you can use the icanhazip.com tool to obtain it:
curl -4 icanhazip.comOnce you have your server’s IP address, enter it into your browser’s address bar:
http://your_server_ipIf everything is configured correctly, you should receive the default Nginx landing page, indicating that your server is running smoothly and ready for management.
4. Managing the Nginx Process
Now that your web server is operational, let’s explore some fundamental management commands.
To halt your web server, use the following command:
sudo systemctl stop nginxTo initiate the web server if it is currently stopped, employ the following command:
sudo systemctl start nginxIf you need to both stop and restart the service, you can use the following command:
sudo systemctl restart nginxWhen making configuration changes, Nginx can often be reloaded without dropping connections. To achieve this, enter the following command:
sudo systemctl reload nginxBy default, Nginx is set to start automatically upon server boot. If this behavior is undesired, you can disable it:
sudo systemctl disable nginxTo re-enable the service for automatic startup at boot, use the following command:
sudo systemctl enable nginxWith these basic management commands, you are now equipped to configure your site to host multiple domains.
5. Understanding Nginx Directories and Files
As you delve into managing the Nginx service, it’s crucial to acquaint yourself with key directories and files. These play a vital role in configuring and maintaining your web server.
Content Directory:
- /var/www/html: This directory houses the actual web content. Initially, it contains the default Nginx page you encountered earlier. You can customize the content by modifying Nginx configuration files.
Server Configuration:
- /etc/nginx: The primary Nginx configuration directory where all configuration files are stored.
- /etc/nginx/nginx.conf: The main configuration file for Nginx, allowing modifications to the global configuration.
Site Configuration:
- /etc/nginx/sites-available/: This directory stores per-site server blocks. Configuration files here are not utilized unless linked to the sites-enabled directory. Typically, all server block configuration is performed here and then activated by linking to the other directory.
- /etc/nginx/sites-enabled/: Enabled per-site server blocks are stored in this directory. These are often created by linking to configuration files from sites-available.
Configuration Fragments:
- /etc/nginx/snippets: This directory contains configuration fragments that can be included elsewhere in the Nginx configuration. It’s useful for managing potentially repeatable configuration segments.
Server Logs:
- /var/log/nginx/access.log: Records every request made to your web server unless configured otherwise.
- /var/log/nginx/error.log: Captures any errors that occur within Nginx.
Familiarizing yourself with these directories and files empowers you to effectively configure and maintain your Nginx web server.
6. Summary
Now that you’ve successfully installed your web server, a multitude of options are at your disposal for the type of content you wish to serve and the technologies you choose to employ, allowing you to craft a more engaging and dynamic user experience. To learn how to configure and use Nginx, please read this blog: Nginx Basic Config
Hi, This is a useful article
This is good article
Hello.
Good cheer to all on this beautiful day!!!!!
Good luck 🙂
Hello!
Good luck 🙂