Install Nginx
In this blog, we will discuss how to use Nginx as a Reverse Proxy on Ubuntu. If you haven’t installed Nginx, you can do so using the following commands:
sudo apt update
sudo apt install nginx
Or, you can read details about Nginx in this blog: Install Nginx on Ubuntu
Create Configuration File
Create a new configuration file for your reverse proxy. Let’s name it reverse-proxy. You can place it in the /etc/nginx/sites-available/ directory.
sudo nano /etc/nginx/sites-available/reverse-proxyBasic Reverse Proxy Configuration
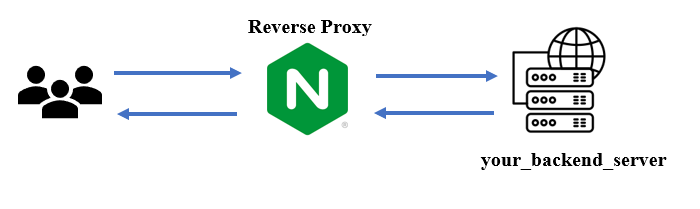
Add the following basic configuration to reverse-proxy. Replace your_backend_server with the actual address and port of your backend server.
server {
    listen 80;
    server_name your_domain.com;
    location / {
        proxy_pass http://your_backend_server;
        proxy_set_header Host $host;
        proxy_set_header X-Real-IP $remote_addr;
        proxy_set_header X-Forwarded-For $proxy_add_x_forwarded_for;
        proxy_set_header X-Forwarded-Proto $scheme;
    }
}
Example: In case you set up the backend server on your local machine and it is running on port 3000, let’s change ‘your_backend_server‘ to ‘localhost:3000‘
In case you set up the backend server on an external server, and it is running on port 8080, let’s change ‘your_backend_server‘ to ‘ip_server:8080‘
Save and Exit
Save the changes to the configuration file and exit the text editor.
Create a Symbolic Link
Create a symbolic link to your configuration file in the sites-enabled directory.
sudo ln -s /etc/nginx/sites-available/reverse-proxy /etc/nginx/sites-enabled/Test Configuration
Before restarting Nginx, it’s a good practice to test the configuration. If you restart Nginx with a wrong configuration, your Nginx will go down and won’t be able to process requests
sudo nginx -tIf the test is successful, you should see a message indicating that the configuration file syntax is okay.
Restart Nginx
Restart Nginx to apply the changes.
sudo systemctl restart nginxUpdate DNS Records
Make sure your domain’s DNS records point to the server where Nginx is installed.
Verify
Open your web browser and navigate to http://your_domain.com. Nginx should now act as a reverse proxy, forwarding requests to your backend server.
Additional Tips:
SSL/TLS: If you want to secure your connections, consider obtaining and configuring an SSL/TLS certificate. You can use Certbot to generate free SSL certificates.
Logging: Configure access and error logging in the Nginx configuration for troubleshooting and monitoring.
Load Balancing: Nginx can also be configured for load balancing if you have multiple backend servers.
Explore more fascinating blog posts on our site!
What are your thoughts on using Nginx, Tomcat, Apache, etc.? Please share your advice with me. Thank you for paying attention to this post