Managing cron jobs on Linux systems is crucial for automating tasks, such as running scripts, calling APIs, and performing system maintenance. However, editing and maintaining cron jobs via the command-line interface (CLI) can become cumbersome and error-prone, especially when dealing with complex setups or multiple jobs. This is where Crontab UI comes in — a web-based solution that makes managing cron jobs significantly easier.
In this post, we will explore how to set up and use Crontab UI to manage cron jobs efficiently. We’ll also discuss why it’s beneficial to manage cron jobs centrally using a user-friendly interface. By the end, you’ll understand how to set up Crontab UI, manage cron jobs, and even integrate it with Docker for more flexibility.
Why Centralized Cron Job Management Matters
Error Reduction
The standard way of managing cron jobs via the command-line crontab editor (crontab -e) is prone to errors. A single typo can break multiple jobs, and troubleshooting these errors can be time-consuming. Crontab UI allows you to visually manage your cron jobs, making it easier to avoid these errors.
Simplified Management
Crontab UI offers an intuitive graphical interface, where you can add, delete, or modify jobs without having to worry about syntax. It supports bulk operations, such as pausing or activating jobs, which is especially helpful when managing hundreds of cron jobs.
Backup and Restore
Unlike traditional crontab setups, where cron jobs might be lost if not backed up properly, Crontab UI allows you to easily back up your job list. You can even export and deploy these cron jobs on other systems, making migrations or recoveries straightforward.
Error Logs and Notifications
Crontab UI provides a convenient way to check for errors in your cron jobs by supporting error logs. Moreover, you can set up email notifications and webhooks to be informed when jobs are executed or fail.
Setting Up Crontab UI
To start using Crontab UI, you’ll need to set up Node.js first. If you haven’t installed Node.js on your system yet, you can get the latest version here.
Step-by-Step Installation Guide
- Install Crontab UI: Once Node.js is set up, installing Crontab UI is a simple process. Open your terminal and run the following command:
npm install -g crontab-ui
- Start Crontab UI: After installation, you can launch Crontab UI by typing:
crontab-ui- This will start the Crontab UI interface on your default web browser. By default, it runs on port
8000.
- Customizing Settings: You can change the host, port, or base URL by setting environment variables before starting Crontab UI. For instance:
HOST=0.0.0.0 PORT=9000 BASE_URL=/my-cron crontab-ui- You might also want to change the default location for storing cron job databases and logs. By default, these files are saved in the installation directory. To override this, use the
CRON_DB_PATHenvironment variable:CRON_DB_PATH=/path/to/storage crontab-ui
- Basic Authentication: If you’re deploying Crontab UI on a publicly accessible server, it’s crucial to secure it with basic HTTP authentication. You can easily set up a username and password:
BASIC_AUTH_USER=myuser BASIC_AUTH_PWD=mypassword crontab-ui
- Using SSL: For secure access over HTTPS, you can configure SSL certificates using environment variables:
SSL_CERT=/path/to/cert.pem SSL_KEY=/path/to/key.pem crontab-ui
Autosave Feature
By default, Crontab UI saves changes only when you manually click “Save” in the UI. However, if you want it to automatically save changes to the cron file, you can enable the --autosave flag:
crontab-ui --autosave
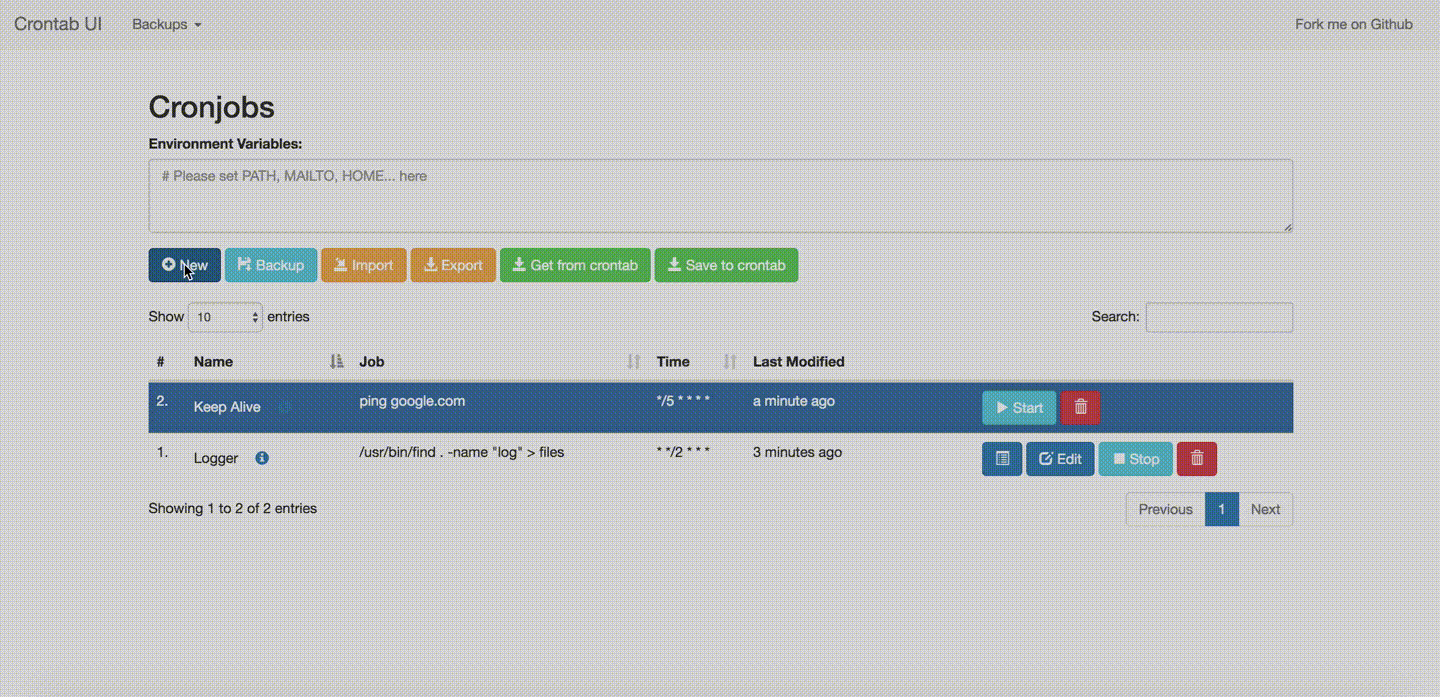
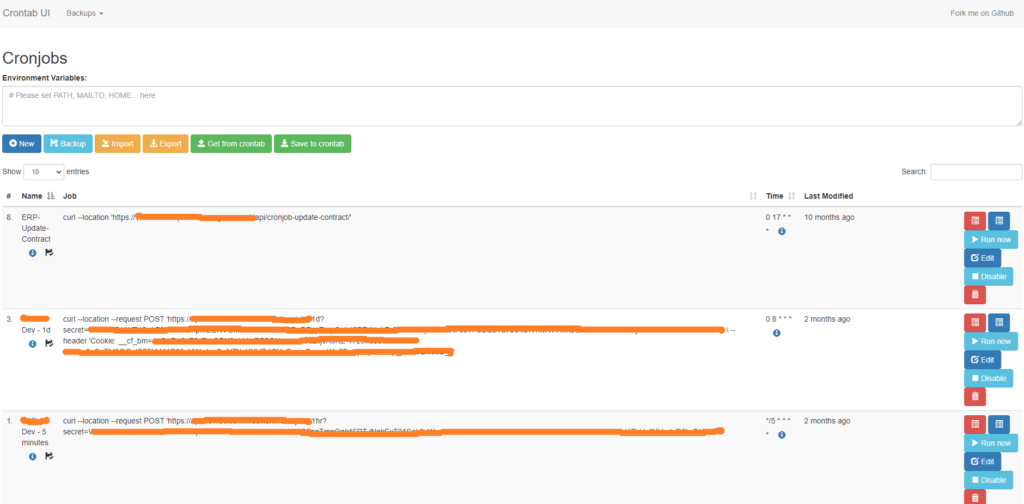
Managing Cron Jobs with Crontab UI
Now that you have Crontab UI up and running, let’s dive into how to manage your cron jobs efficiently.
Adding a Cron Job
In the UI, click the “Add Job” button to create a new cron job. You can define:
- The command to run (e.g., running a Bash script or calling an API using
curl). - The schedule using the cron syntax. If you’re not familiar with cron syntax, Crontab UI offers a simple helper for setting up job frequencies.
- Job name and tags for better organization.
For example, if you want to call a web API every hour, you can set the following:
- Command:
curl http://example.com/api/update - Schedule:
0 * * * *
Modifying or Pausing a Cron Job
If you need to modify a cron job, simply click the edit button next to the job in the UI. You can also temporarily pause a job by toggling the “Active” switch.
Deleting a Cron Job
If a cron job is no longer needed, you can delete it from the UI by clicking the delete button. Crontab UI makes this process seamless, avoiding the risk of accidentally deleting other jobs (a common risk when using the crontab -e CLI tool).
Backups and Restore
Crontab UI includes an easy way to back up all your cron jobs. You can export your cron jobs as a JSON file and later import them into another instance of Crontab UI, making migrations or disaster recovery effortless.
Dockerizing Crontab UI
For those who prefer using Docker, Crontab UI offers a pre-built Docker image, making deployment even more straightforward.
Running Crontab UI with Docker
To start Crontab UI in a Docker container, simply run:
docker run -d -p 8000:8000 alseambusher/crontab-ui
If you want to enable basic authentication:
docker run -e BASIC_AUTH_USER=myuser -e BASIC_AUTH_PWD=mypassword -d -p 8000:8000 alseambusher/crontab-ui
You can also mount a folder from your host to store the cron job database and logs persistently:
mkdir -p /path/to/crontabs
docker run --mount type=bind,source=/path/to/crontabs,target=/crontab-ui/crontabs/ -d -p 8000:8000 alseambusher/crontab-ui
Conclusion
Crontab UI simplifies the management of cron jobs, especially for users who manage multiple or complex schedules. By providing a visual interface, error logging, and features like backup and restore, it helps prevent common mistakes and saves time. Its ability to run in Docker adds flexibility, making it easy to deploy and scale across different environments.
Whether you’re running Linux Bash scripts, calling APIs using curl, or managing system maintenance tasks, Crontab UI makes it easier to automate, monitor, and troubleshoot your cron jobs. With features like autosave, basic authentication, and SSL support, it’s a robust solution for both individual developers and teams.
Consider switching to Crontab UI today, and start managing your cron jobs more efficiently!
Explore more fascinating blog posts on our site!